Okay, so I finally got around to setting up that Swimways 3-in-1 game thing for the pool this weekend. Had it sitting in the garage for a bit, waiting for decent weather. Figured I’d share how it went, step-by-step.

Getting Started: Unboxing and Setup
First thing, dragged the box out to the patio. Opened it up. You get a bunch of plastic tubes, connectors, two base things, the hoop and backboard piece, two nets (one basketball, one volleyball), and a small inflatable ball. Standard stuff. Spread all the pieces out so I could see what I was working with. Instructions were included, pretty basic diagrams.
I started snapping the main frame pieces together. It’s mostly just pushing tubes into connector joints. Some needed a good shove to really seat properly. You gotta listen for that click sound. Built the two main side structures first. Then, I grabbed the base pieces. These are supposed to be filled with water or sand for weight. Definitely use water. Trust me, makes it way easier to move around and empty later. I filled them up right there by the pool with the hose. Then I attached the side structures to the weighted bases.
Next up was deciding: basketball or volleyball first? Went with basketball since it seemed quicker.
Round One: Basketball
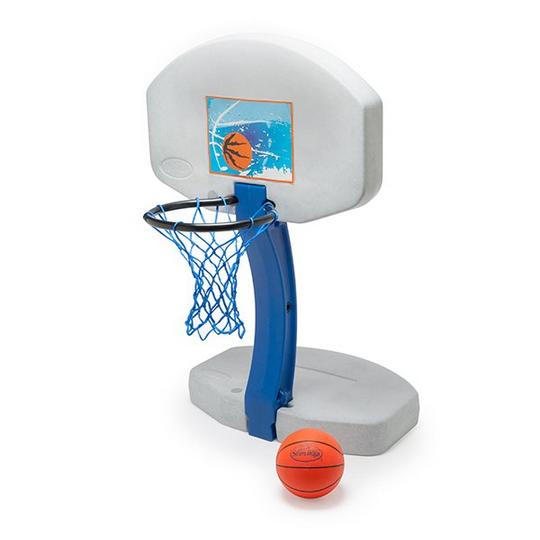
Attached the backboard and hoop piece to the top connector on one of the side structures. It just sort of slotted in. Then clipped the basketball net onto the hoop hooks. Took maybe two minutes. The ball needed inflating, used a little hand pump I had lying around. Easy peasy.
Tossed the whole setup into the pool. The bases did their job, kept it pretty stable even with some splashing. We started shooting hoops. The ball is light, which is good for indoors or a pool, doesn’t hurt if it hits you. It floats, obviously. Took turns shooting. It held up fine, even when my nephew tried a slam dunk (missed, thankfully). It’s plastic, so you don’t wanna go too crazy, but for casual shooting, it worked great. We probably played for a good hour.
Switching Gears: Volleyball Time
Alright, time to test the volleyball setup. Pulled the game out of the pool onto the deck. Taking the basketball hoop off was simple, just unclipped it. Then I grabbed the other side structure (the one that didn’t have the hoop) and the long volleyball net.

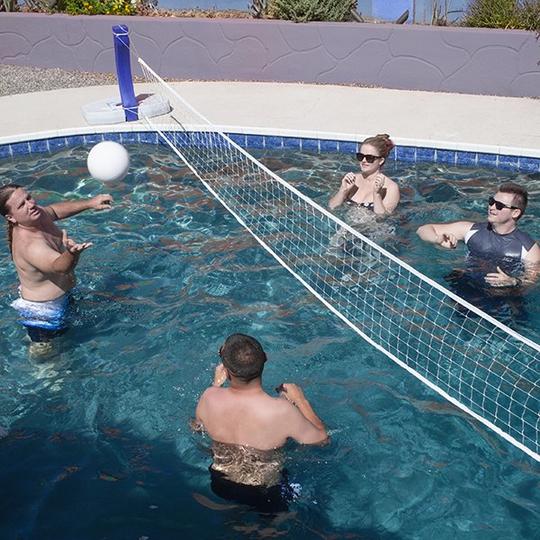
This part involved stretching the net between the two side structures. There are little knobs or hooks on the frame pieces designed for the net loops. Hooked one side, pulled it across, and hooked the other side. Had to adjust the tension a bit to get it reasonably tight. Not super tight like a real volleyball net, but good enough for the pool. The whole switch probably took less than 5 minutes.
Round Two: Volleyball
Put the newly configured volleyball setup back into the pool. We had four people, so two on each side. Served the little inflatable ball back and forth. It worked surprisingly well! The net stayed up, the bases kept things anchored. Because the ball is so light, you can’t really spike it hard, but for just volleying it back and forth, it was a lot of fun. Kept us busy for another hour or so. The net height is kinda low, obviously, more like badminton height, but perfect for playing while you’re in the water.
Final Thoughts
So yeah, the Swimways 3-in-1 game did what it promised. Assembly was straightforward, no tools needed, just push and click. Switching between basketball and volleyball was quick and easy. Using water in the bases is the way to go. It provided a good bit of fun for both kids and adults. It’s plastic, so I wouldn’t expect it to last forever with rough use, but for the price and the fun we had, I’m happy with it. Good little addition for pool days.


